The virtual vessels on this site are created by an image-based digital modeling technique called Structure from Motion (SfM). This sensory or range imaging technology calculates and constructs three-dimensional forms from a series of two-dimensional images, using overlapping reference points in the space of each image to stitch together the sculptural form. This process can be effectively applied to small objects or artifacts, as well as buildings and contained landscapes to create photogrammetric 3D digital models.
SfM modeling requires:
- a digital camera
- affordable processing software or free platforms (see below for options)
- adherence to specific rules for the photographic input
To create your own, follow these instructions for creating a virtual vessel (or other object):
- Select your object and prepare your photography environment
To ensure the most accurate representation of coloration and to avoid errors in the three-dimensional shape construction, the object must be photographed in a consistently lit environment that also allows the photographer to walk completely around the display area. If indoors, the environment should be set up with diffused flood lighting to prevent strong directional highlights and shadows. If outdoors, try to take your photographs on an overcast day or in a shaded area.
Create reference points and place them in a circle around your object. These should appear in every photograph, providing consistent visual data for the stitching process. Reference points could most easily be created with small pieces of paper with dark and distinct markings, such as the post-it notes and doodles in the following example image.
Example:
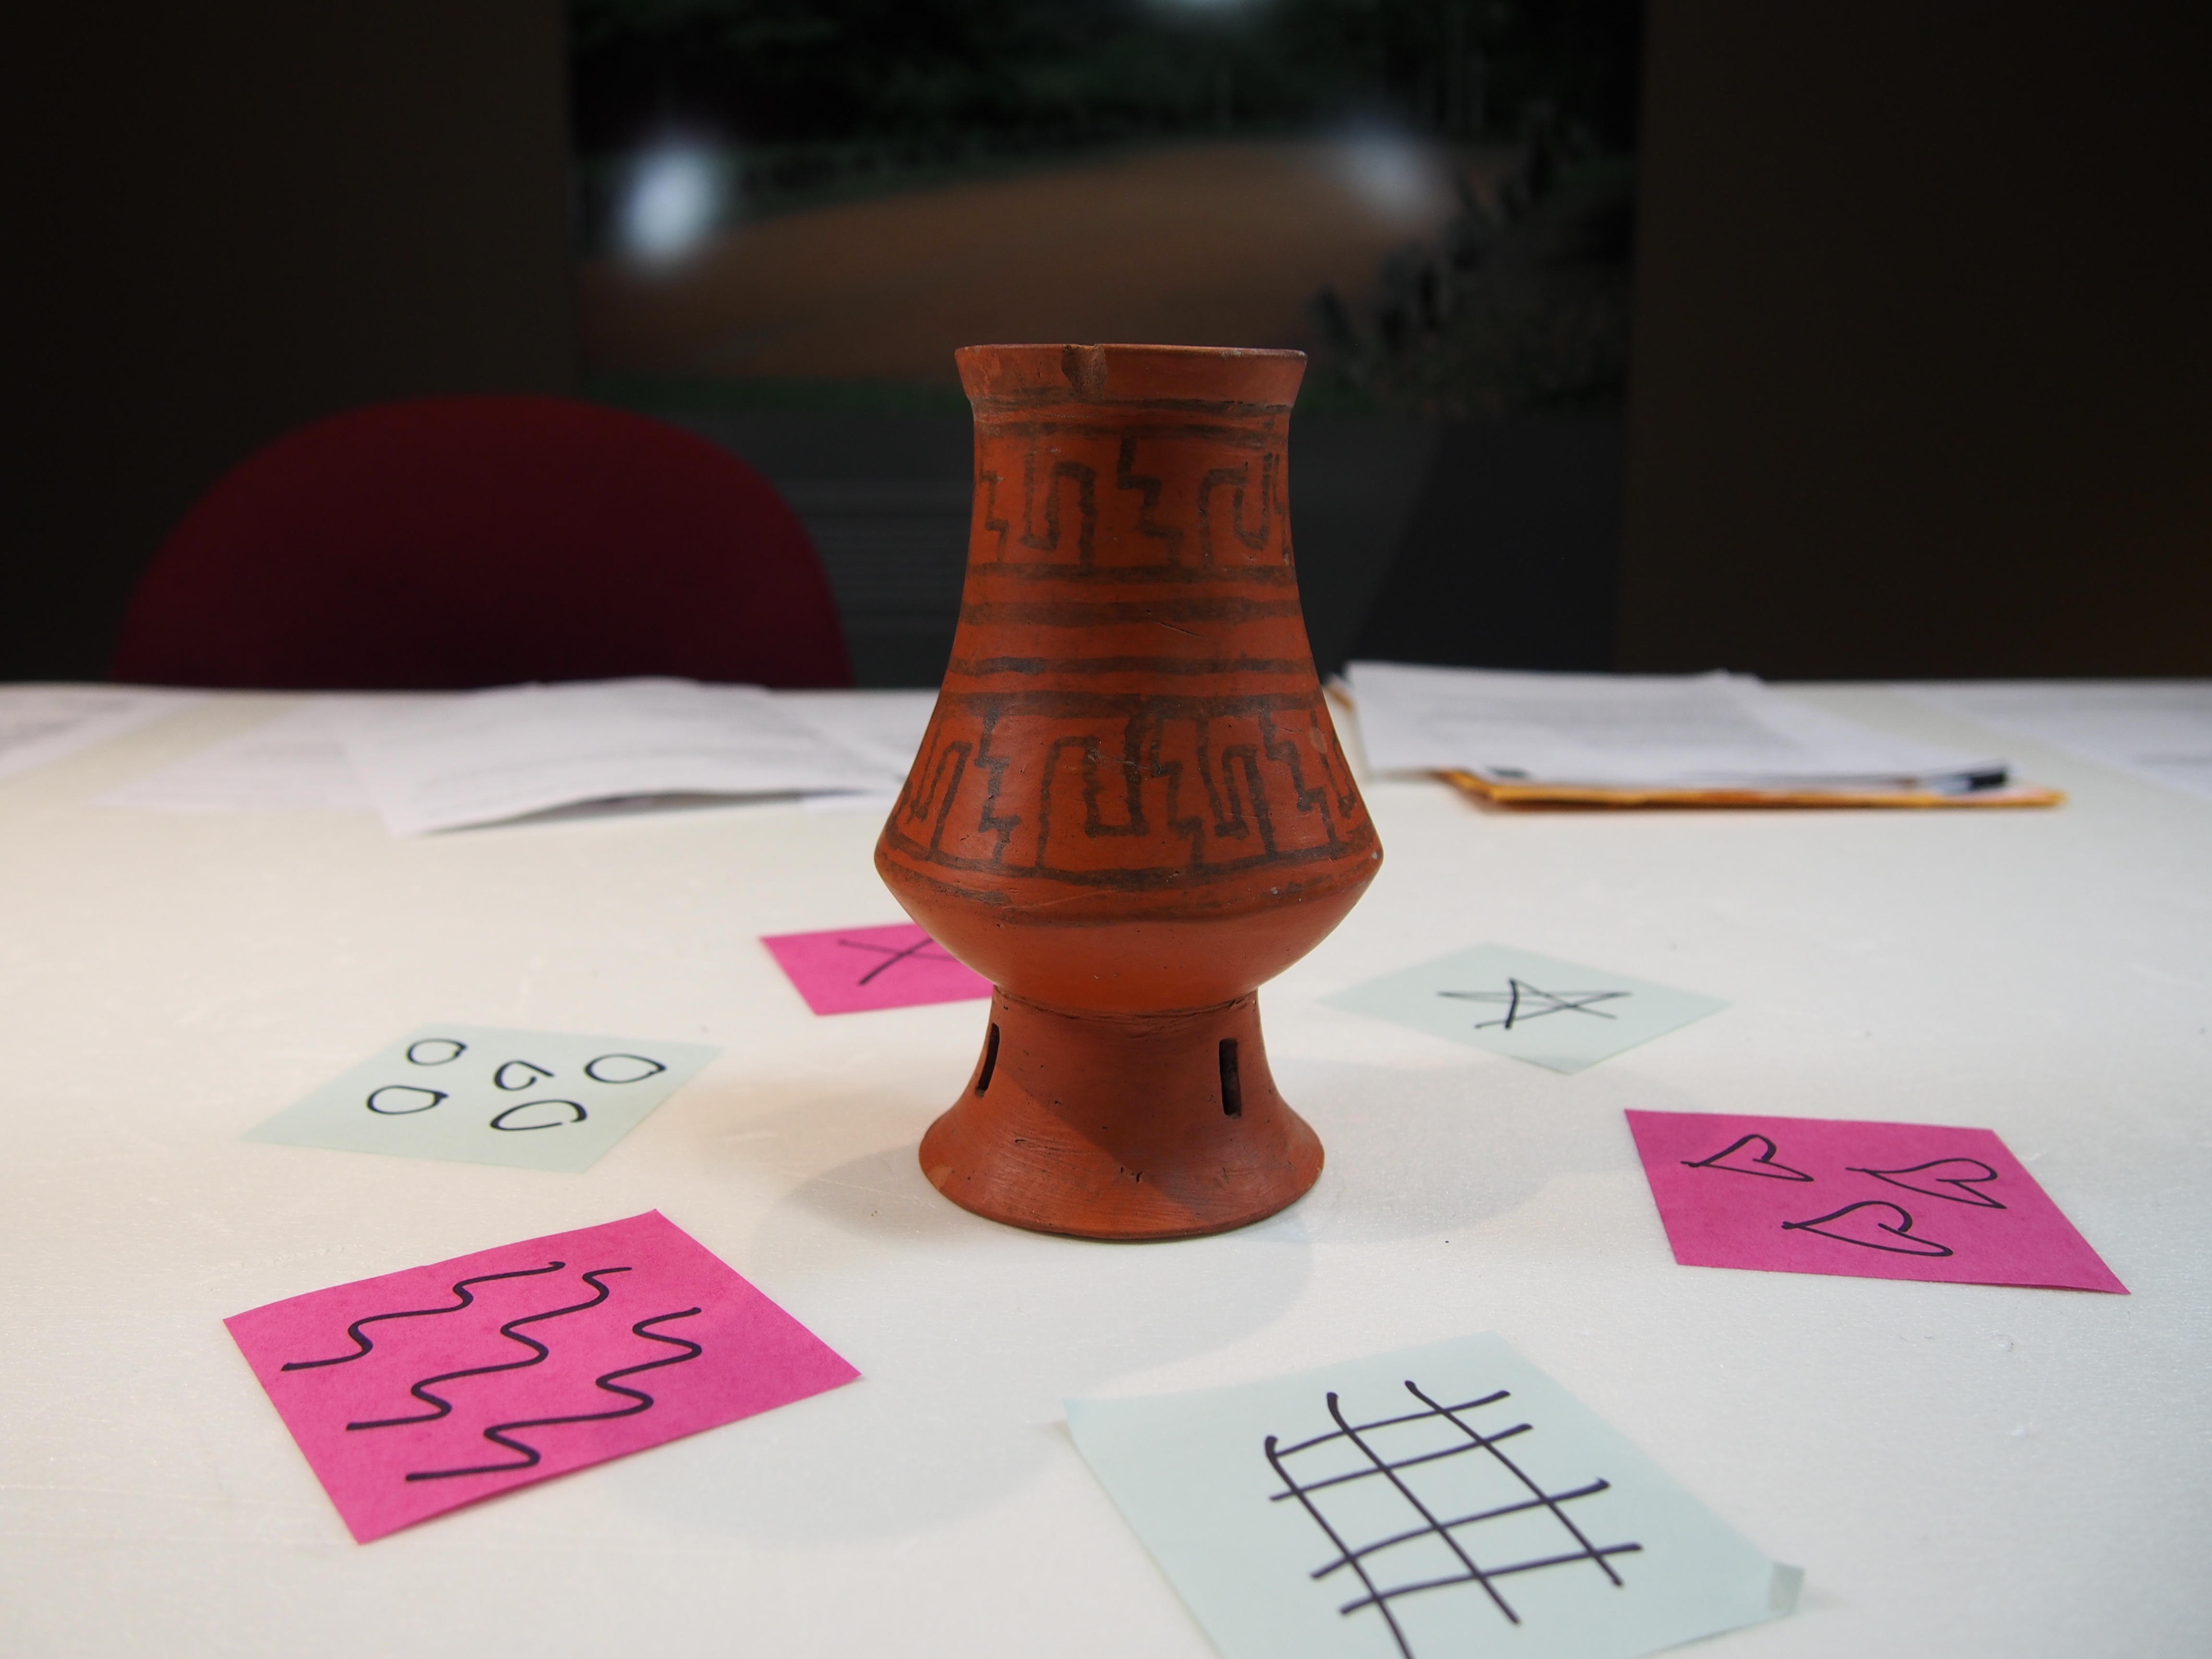
For this project, I set up a table within the Haffenreffer Museum with diffused lights set both around and above the object. The use of the table as a surface enabled me to walk a complete 360 degrees around the object. Although the conditions for lighting were still not ideal (some shadows are apparent on the final models), this initial set-up process ensured much more successful modeling results and reduced the amount of post-processing edits needed.
- Take the photographs
The object must be methodically photographed in a manner that will record a complete 360-degree view of all of its surfaces. The photographer should aim to take to complete rotations of images within two planes–the first aimed straight on at the center of the object, the second raised approximately 45 degrees from the plane of the first image series to capture a full view from above the object. Each image should be spaced out approximately 20 degrees or less, ending up with not more than 75 images, but no less than 40. These rules will ensure that the images collected contain enough overlapping data to use as effective reference points for the model construction.
Before you move on to another project, for your last image, turn your object upside down and take a straight-down photograph of the underside.
Example:
IMAGE
This diagram illustrates the ideal photography method.
- Processing using Autodesk’s 123D Catch
Once you have Autodesk’s free platform 123D Catch running, select the “Create a New Capture” option. Follow the prompts, and upload the series of photographs that were taken of your object. The platform will work through several compilation and stitching stages, displaying process bars for each stage of the capture creation. One the capture is complete, it will look like this within 123D Catch:
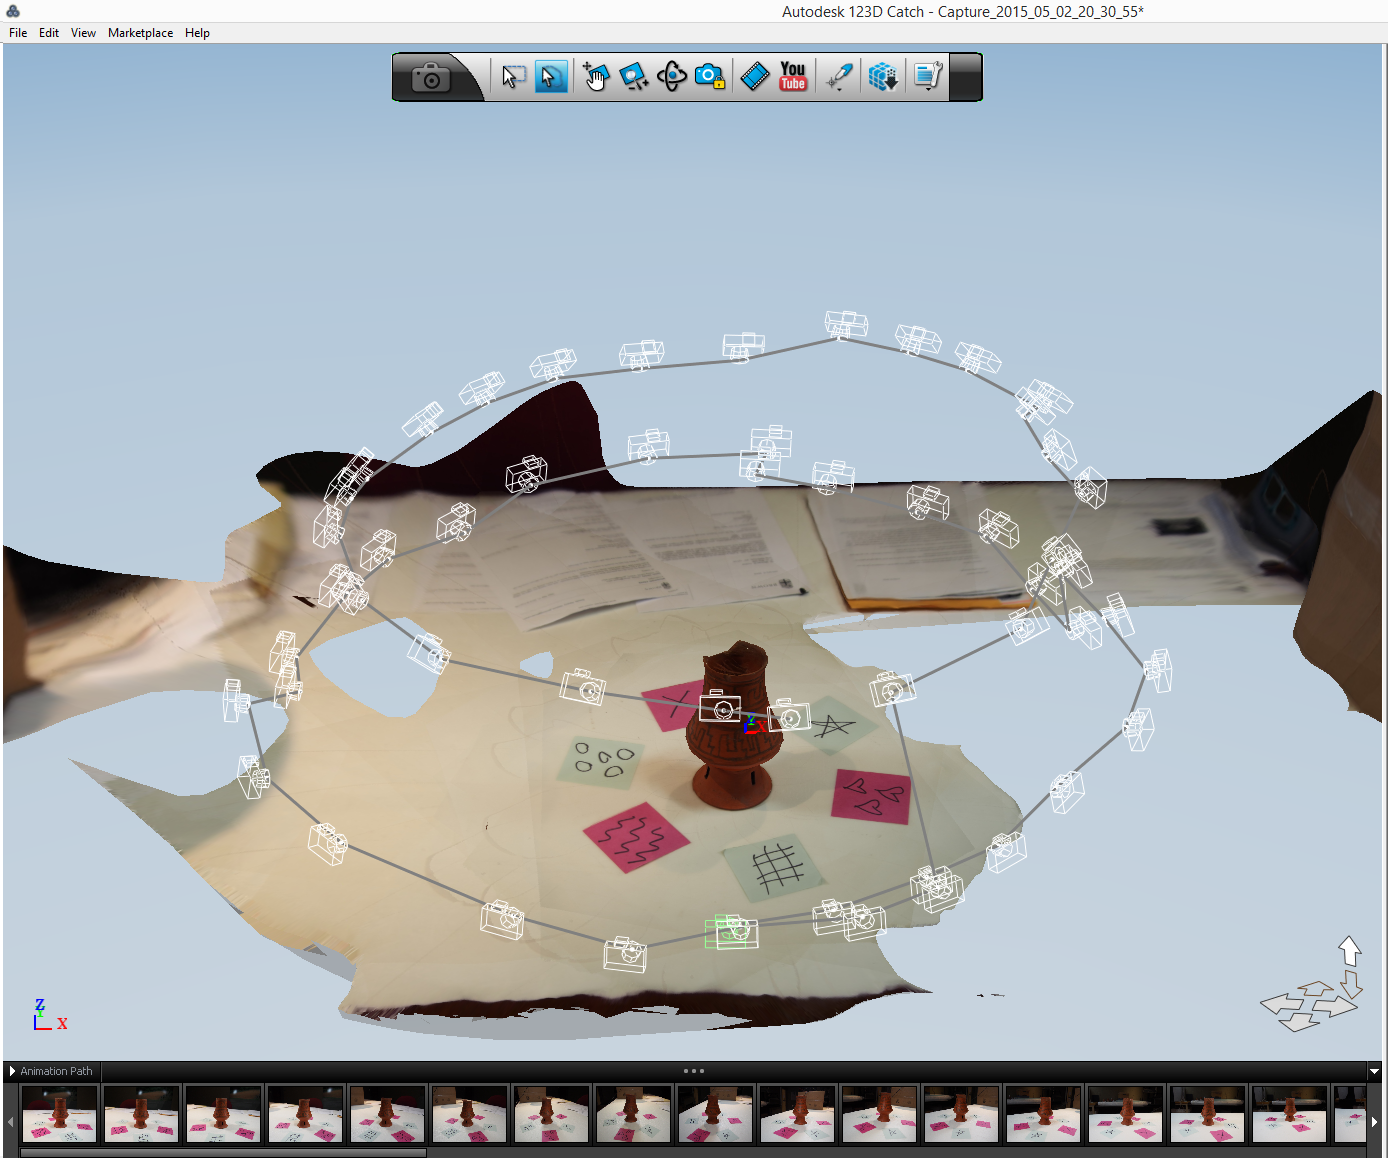
The small camera icons show the angle where each individual photo was placed during the stitching process. Clicking on a camera will bring up with specific image used for this point in the model.
- Manipulating and editing your model
Navigate around your model space in 123D Catch and check it out, using these controls:
Pan / Orbit / Zoom in and out / Change view style / Increase density
The initial capture of the object in 123D Catch includes much of the surface on which the object was resting, and thus the model does not have a complete underside, but instead a hollow opening. First, clean up the surrounding parts of the model in 123D Catch:
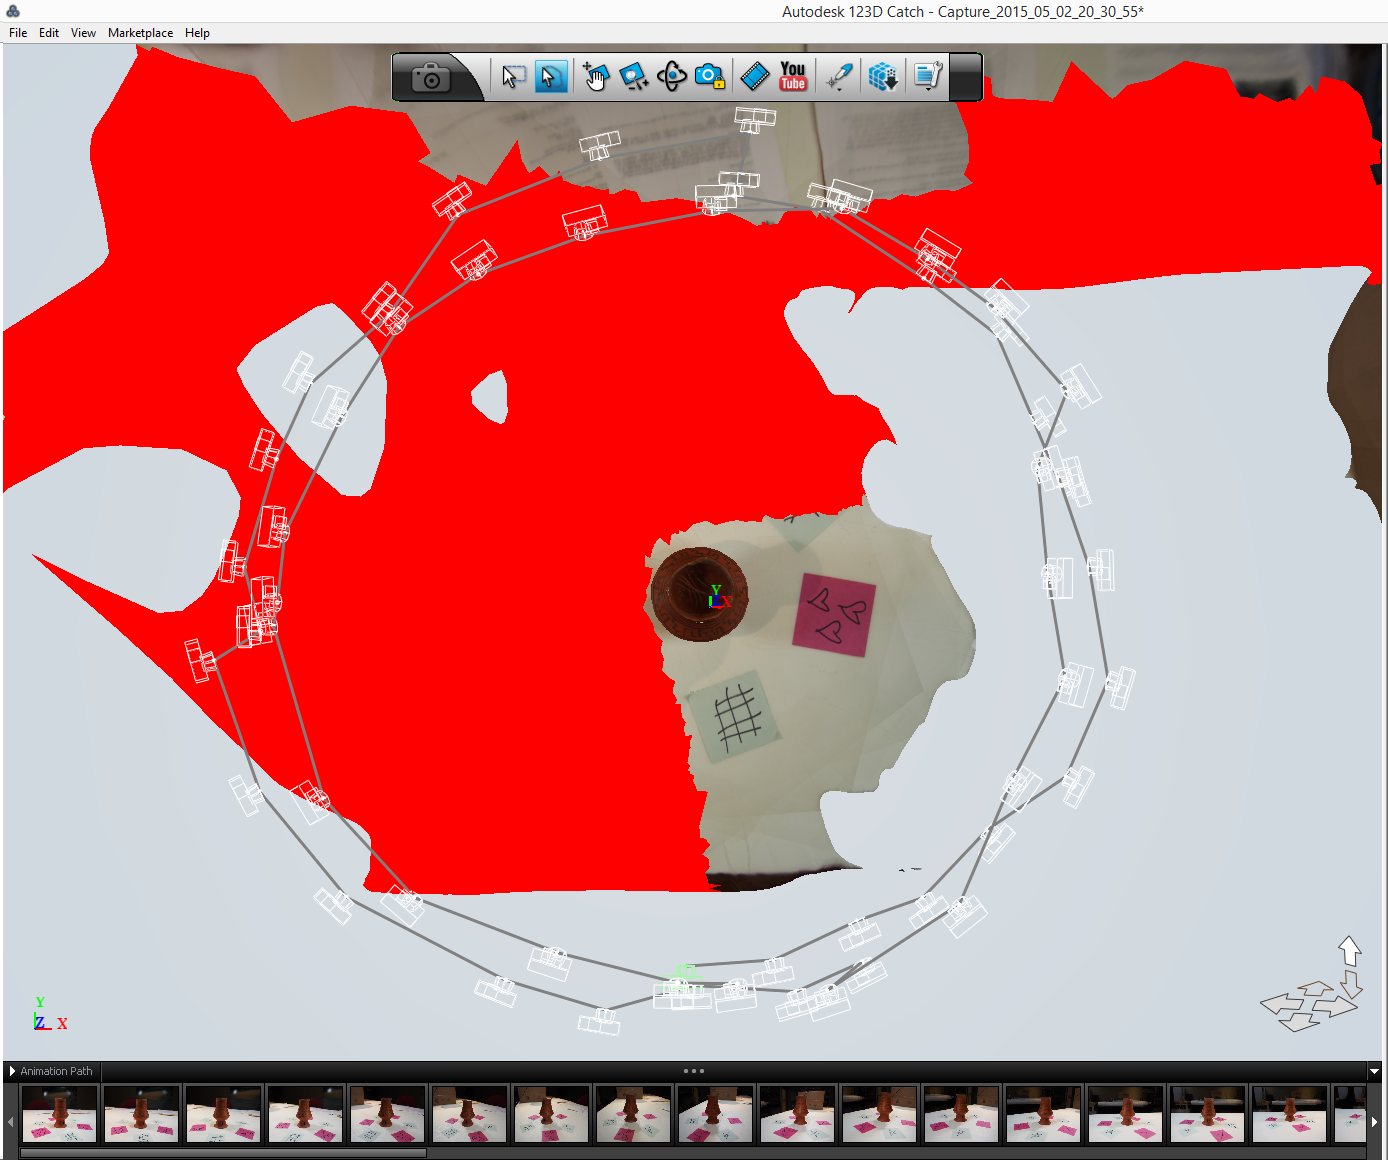
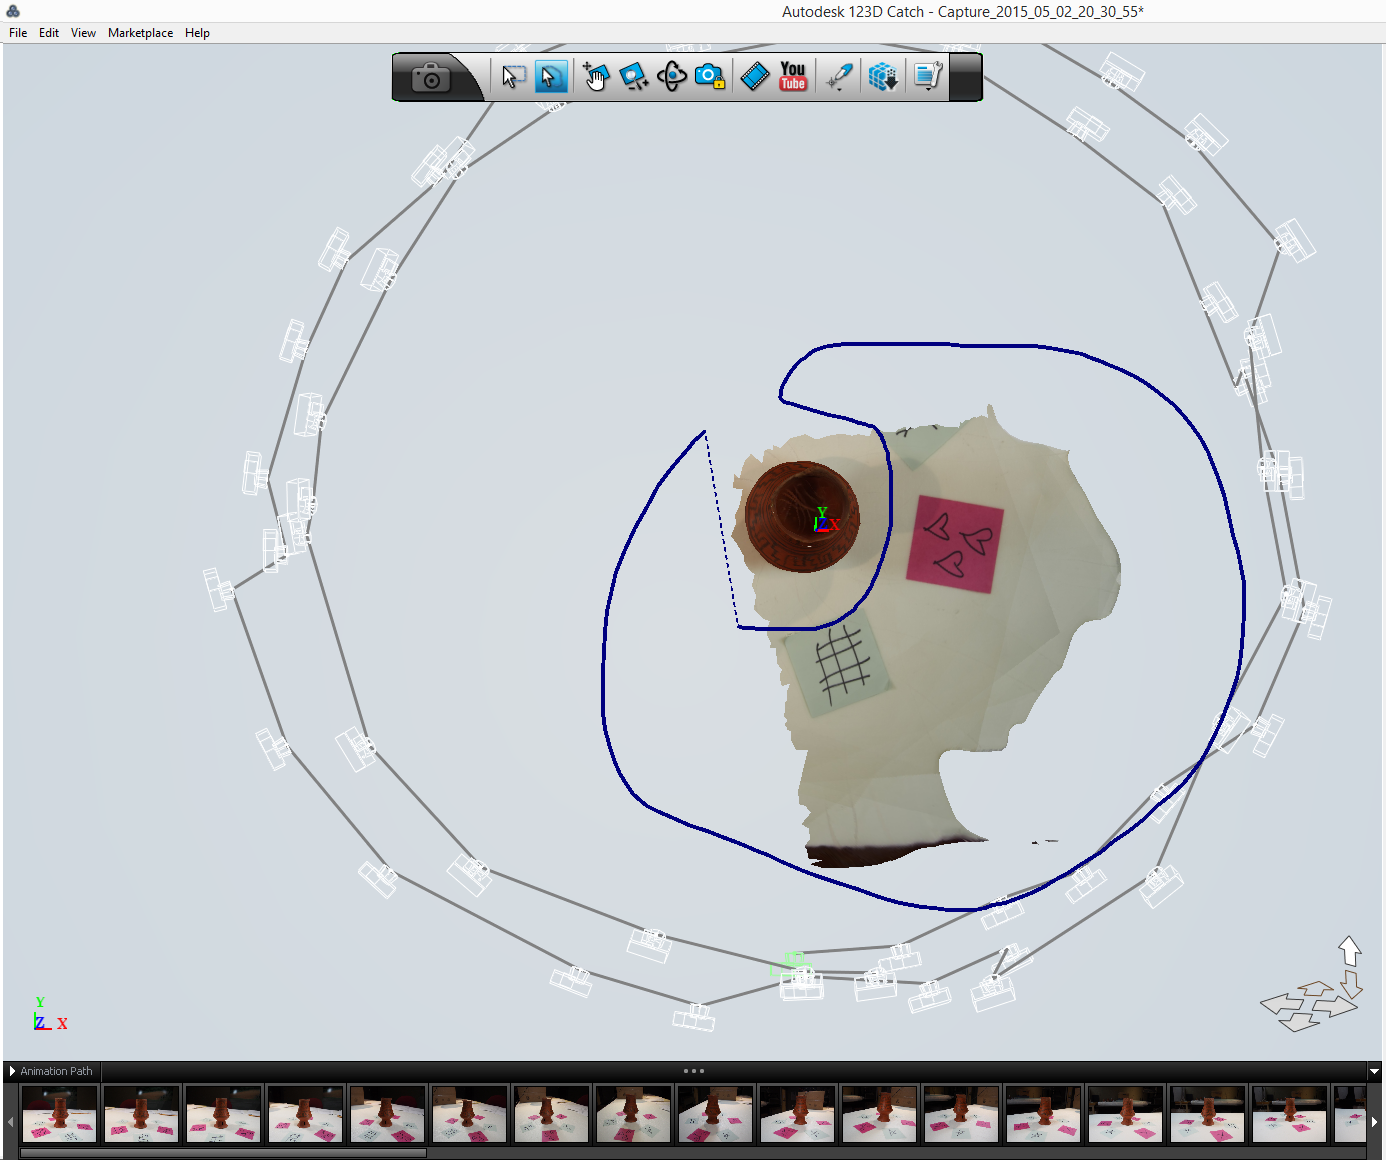
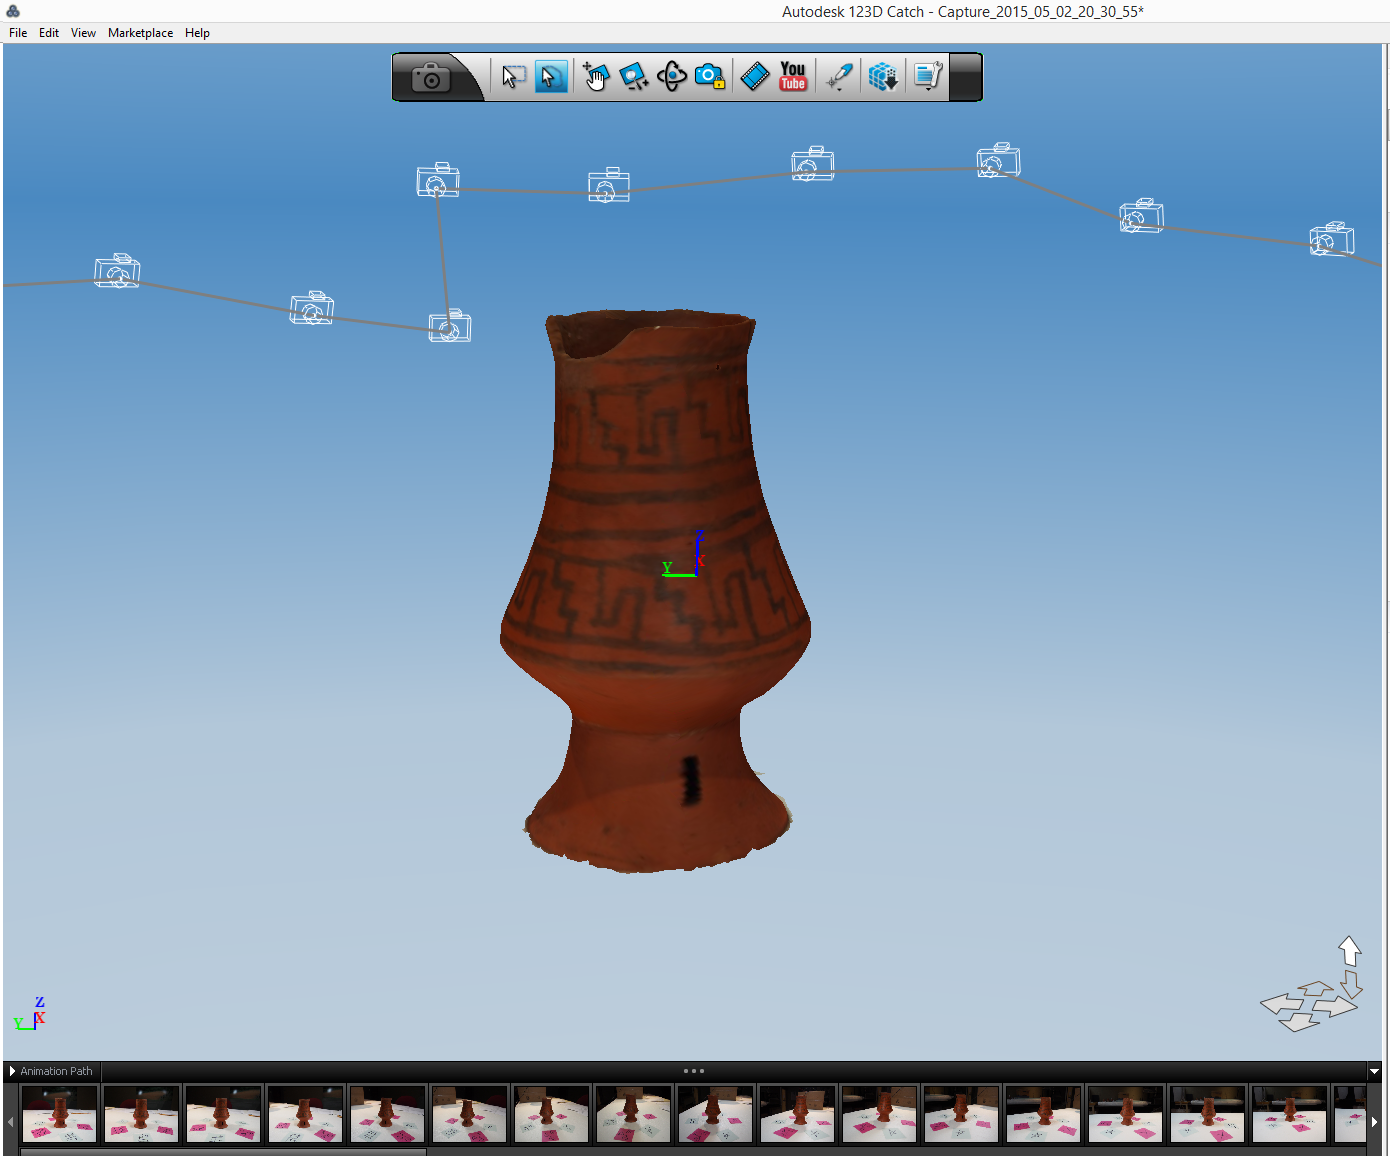
Use the selection tool and navigation controls to highlight all the polygons that compose the surfaces surrounding the model. Delete this geometry from your model and save the result. Make sure you are completing this editing process in the TITLE mode, so that your final product is as detailed as possible.
- Optional post-processing
If you would like to make additional edits and revisions to your model, it must be completed in other modeling software. The virtual vessels for this project were edited using Autodesk’s 3D Studio Max (not free). However, if you are satisfied, just export your model!
Polygon- and vertex-level editing capabilities in 3D Studio Max allowed for any holes, including the bottom opening on the model to be capped with a flat plane. Once filled with geometry, I utilized the photograph that I took of the bottom of the object as a texture for the new geometry, completing the model. See image:
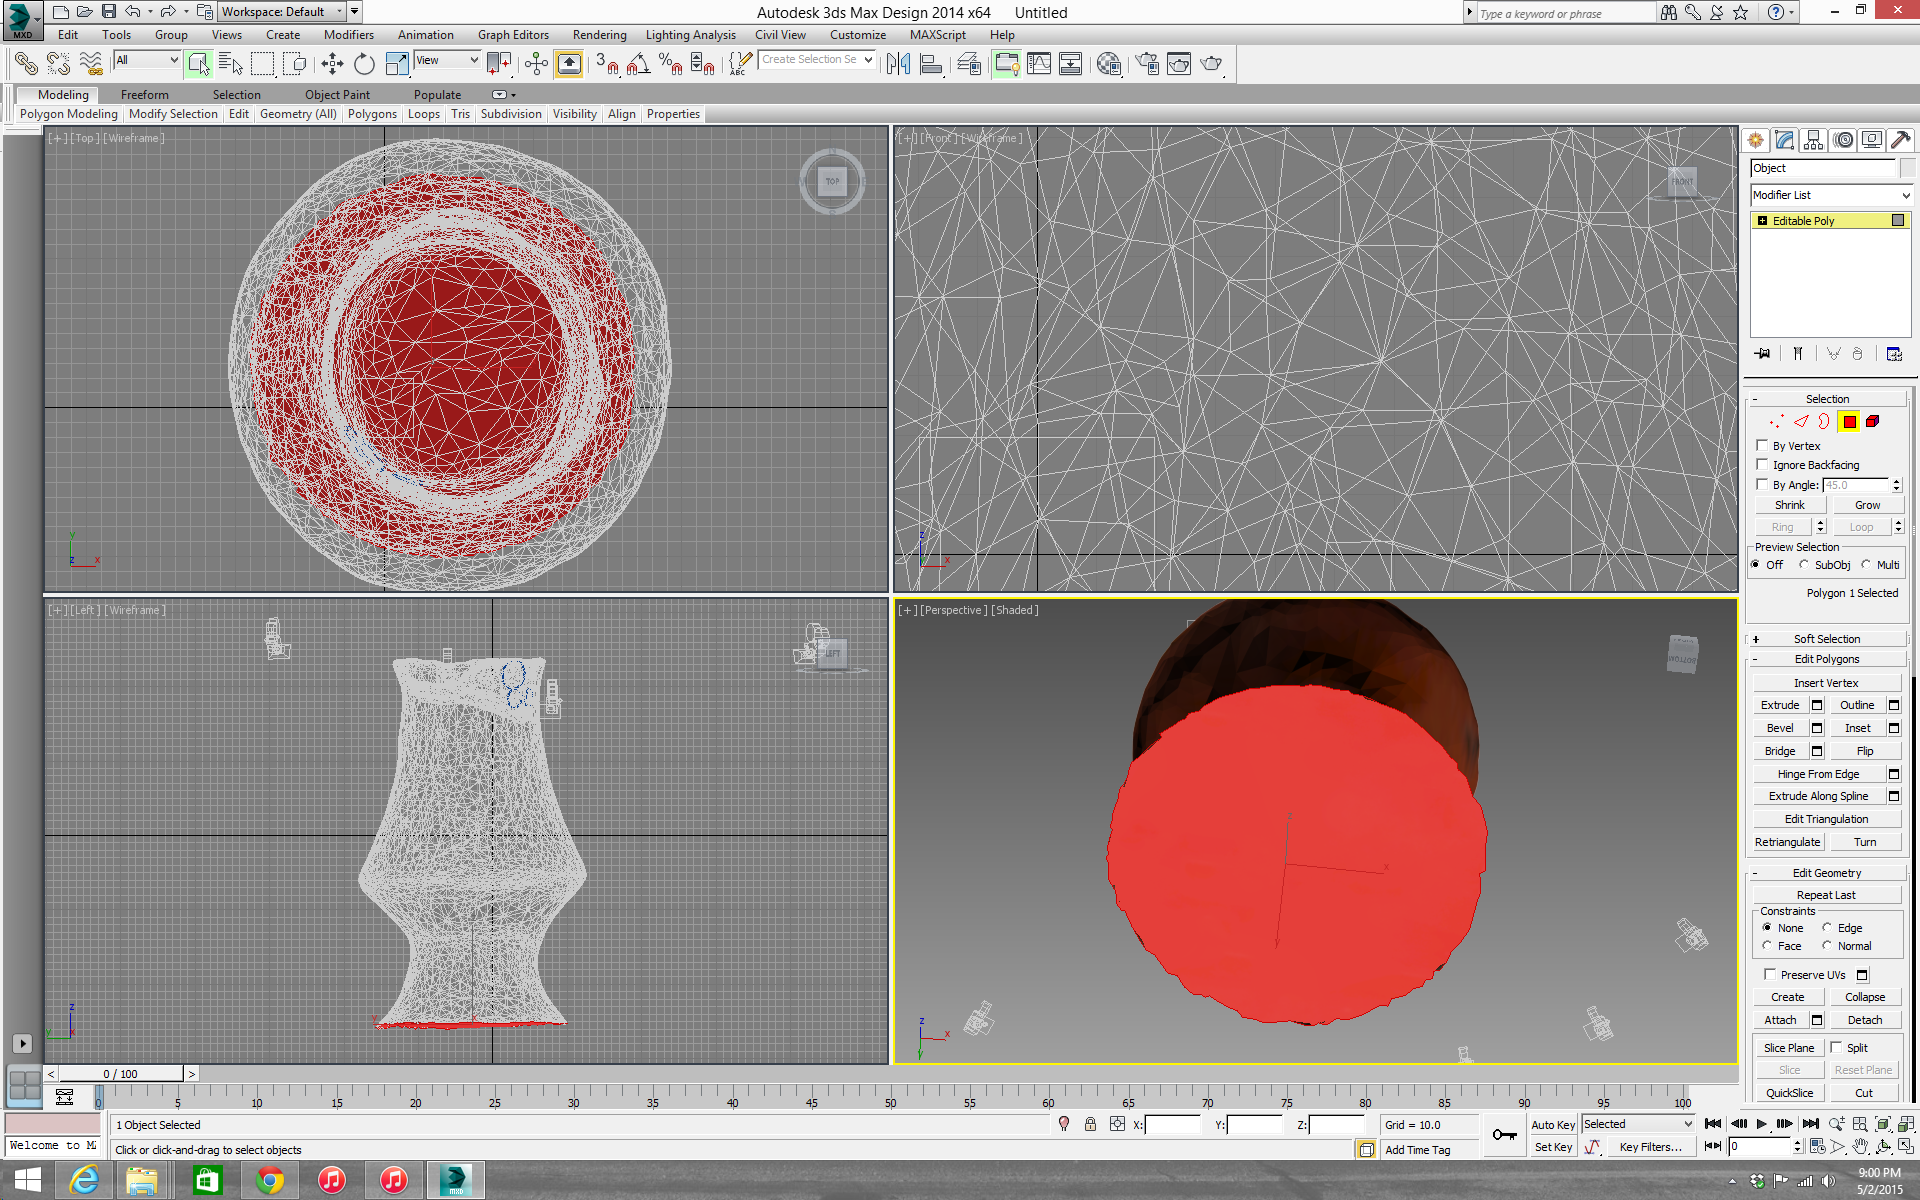
Exporting–Both directly from 123D Catch, and also from post-processing softwares, FBX files allow for easy exporting and importing, while retaining textures on models.
- Interactive Display
Now that you have your model, what should you do with it? A few options include taking still screenshot images for illustrations, creating animation videos, uploading it to an interactive web-viewer like SketchFab, or converting it to a .stl file for 3D printing. SketchFab viewers include iframe HTML code, and can be embedded into any other website. Wordpress features a SketchFab plug-in to assist in making display attractive and easy.
Additional Notes
**It is important to remember, when using 123D Catch and a few other photogrammetric platforms, your object cannot move during the photography process.
**123D Catch has released a mobile app, so you can now create 3D models with the camera on your phone or tablet and process them directly through the device.
**Other popular and easy-to-use processing platforms include:
However, not all operate the same way, so pay attention to instructions and methodologies.
